Coding Tesserxel (II): More About Scene/Rendering
In the previous article, we provided a preliminary introduction to using the Tesserxel library’s four module to quickly build and draw a 4D hypercube. In this article, we continue with two examples to gain a deeper understanding of features including rendering control, camera control, and advanced materials.
Scene 1
I plan to place two hypercubes and one hypersphere on a 3D floor. We will use the four module’s camera controller, material nodes, and various types of lights, and add dynamic effects to the lights using vector operation functions.
Modeling
Now there should be no difficulty in modeling. This section is just a review. First, we write the geometry data for the 3D floor, hypercubes, and hypersphere:
// Hypercube geometry data
const cubeGeometry = new FOUR.TesseractGeometry();
// Hypersphere geometry data
const glomeGeometry = new FOUR.GlomeGeometry();
// Floor geometry data, a 3D cubic floor with a side length of 10.0
const floorGeometry = new FOUR.CubeGeometry(10.0);
When specifying a Mesh, you must also specify a material. We first create a simple white material with highlights, material1, and then create Meshes using the geometry data. The two hypercubes only differ in position, so they can share the same geometry data:
let material1 = new FOUR.PhongMaterial([1.0, 1.0, 1.0]);
let cubeMesh1 = new FOUR.Mesh(cubeGeometry, material1);
// place cubeMesh1 to the left
cubeMesh1.position.x = -2;
cubeMesh1.position.y = 2;
let cubeMesh2 = new FOUR.Mesh(cubeGeometry, material1);
// place cubeMesh2 to the right
cubeMesh2.position.x = 2;
cubeMesh2.position.y = 2;

let floorMesh = new FOUR.Mesh(floorGeometry, material1);
// It's boring to use the same material for everything. Let's give the hypersphere a new blue material and set the shininess higher
let glomeMesh = new FOUR.Mesh(glomeGeometry, new FOUR.PhongMaterial(
    [0.2, 0.2, 1], 50
));
// To showcase the feeling of 4D space, I deliberately offset it from the hypercubes on both the y and z axes
glomeMesh.position.set(0,1,1,1);
Then we add the objects to the scene, set the camera’s position, and the app is ready to run.
// Add to the scene
app.scene.add(glomeMesh);
app.scene.add(cubeMesh1);
app.scene.add(cubeMesh2);
app.scene.add(floorMesh);
// Set camera position
app.camera.position.w = 5.0;
app.camera.position.y = 2.0;
// Run the scene
app.run();
Lighting
If you run the code following the steps above, you will find the screen is completely black. This is because we haven’t added any lights yet. We’ll add more code before executing app.run. This time, in addition to ambient light, we will add a spotlight:
// Ambient light
app.scene.add(new FOUR.AmbientLight(0.1));
// The three parameters are RGB color intensity, cone angle, and edge hardness
let spotLight = new FOUR.SpotLight([800, 800, 800], 40, 0.2);
app.scene.add(spotLight);
// Raise the y-coordinate of the light source
spotLight.position.y = 10;
We can control the spotlight’s position and rotation. By default, the spotlight is pointed in the negative y-direction (downward).
Camera Control
Finally, we can see our scene. However, the camera angle is currently fixed and cannot be moved. Now, let’s add a camera controller, which can be done with a single line of code:
app.controllerRegistry.add(new tesserxel.util.ctrl.KeepUpController(app.camera));A brief explanation:
- The
app.controllerRegistryrecords all controllers, including theretinaControllerfor voxel interaction that Tesserxel comes with by default. - The
KeepUpControlleris a controller that keeps the camera upright. For specific interaction methods, please see Play Tesserxel (I): View Control. Its constructor requires passing the object to be controlled. We want to control the camera,app.camera. When creating the controller registry, you can also pass aconfigobject in the constructor to specify whether to prevent default events (such as the right-click menu, page scrolling, or keyboard-triggered browser default actions) viapreventDefaultand whether to enable mouse hiding and locking viaenablePointerLock.four.Appautomatically creates a ControllerRegistry object, so we pass acontrollerConfigwhen creating the app to specify whether to enable these features. Both are off by default.
const app = await tesserxel.four.App.create({ canvas, controllerConfig: {
    preventDefault: true,
    enablePointerLock: true,
} });
The key bindings for camera movement are, by default, arranged as introduced in Play Tesserxel (I): View Control. The key bindings (using event.code, see this website for details), as well as the keyboard movement speed and mouse control speed, can all be configured. See the table below for details.
| Configuration Parameter | Explanation | Default Value |
|---|---|---|
| mouseSpeed | Speed coefficient for horizontal mouse rotation | 0.01 |
| wheelSpeed | Speed coefficient for vertical mouse wheel rotation | 0.0001 |
| keyMoveSpeed | Speed coefficient for moving the camera with keyboard keys | 0.001 |
| keyRotateSpeed | Speed coefficient for rotating the camera with keyboard keys | 0.001 |
| damp | Damping coefficient for camera movement/rotation, used for smooth control | 0.05 |
| keyConfig.front | Move forward (w-) | “KeyW” |
| keyConfig.back | Move backward (w+) | “KeyS” |
| keyConfig.left | Move left (x-) | “KeyA” |
| keyConfig.right | Move right (x+) | “KeyD” |
| keyConfig.ana | Move ana (z-) | “KeyQ” |
| keyConfig.kata | Move kata (z+) | “KeyE” |
| keyConfig.up | Move up (y+) | “Space” |
| keyConfig.down | Move down (y-) | “ShiftLeft” |
| keyConfig.turnLeft | Turn left | “KeyJ” |
| keyConfig.turnRight | Turn right | “KeyL” |
| keyConfig.turnAna | Turn ana (z-) | “KeyU” |
| keyConfig.turnKata | Turn kata (z+) | “KeyO” |
| keyConfig.turnUp | Turn up | “KeyI” |
| keyConfig.turnDown | Turn down | “KeyK” |
| keyConfig.spinCW | Spin (clockwise from above the camera) | “KeyZ” |
| keyConfig.spinCCW | Spin (counter-clockwise from above the camera) | “KeyX” |
| keyConfig.disable | Holding this key disables all camera controls | “AltLeft” |
| keyConfig.enable | Holding this key enables camera controls (not set by default) | “” |
Note: keyConfig.disable is set to "AltLeft" by default because holding the Alt key is for operating the 3D voxel rendering perspective, so camera controls for the 4D scene need to be disabled to avoid conflicts.
Also note: To keep the camera upright, the KeepUpController saves the horizontal and vertical rotations separately. Once it takes over the camera, the camera’s orientation and position are managed internally. Directly changing the camera’s orientation later (e.g., in a frame loop) is ineffective because each loop will be overwritten by the KeepUpController‘s update logic. If you do need to change the camera’s orientation externally, you must call updateObj once after the change to force a synchronization with the controller’s internal state. Tesserxel was not designed for continuous automatic synchronization for two reasons: one is performance, to avoid repeated data conversion in every frame; the other is numerical stability, as frequent conversions between the standard rotation representation and the controller’s internal separated representation can easily accumulate odd errors.
Another common controller is the TrackBallController, similar to the one in the Jenn3D software. Although it’s not suitable for this scene as it can rotate the floor to an arbitrary tilted position, we will use it in the second scene. Here’s a quick explanation of its usage: It has two modes—controlling an object and controlling the camera—which are specified by the second parameter of its constructor. In object control mode, it simply performs various rotations on the object; in camera control mode, it rotates and zooms the camera, and allows you to set the camera’s rotation center. It’s important to note that the camera’s initial position should not coincide with the rotation center, as this will lead to a zero-vector normalization error, locking the camera’s position.
// The second parameter of the constructor is 'true' for camera control mode, 'false' for object control mode
app.controllerRegistry.add(new tesserxel.util.ctrl.TrackBallController(app.camera, true));| Configuration Parameter | Explanation | Action Plane | Default Value |
|---|---|---|---|
| center | Rotation center coordinates | / | new Vec4() (origin) |
| mouseButton3D | 3D rotation operation | xz, yz | 0 (left button) |
| mouseButtonRoll | Roll operation | xy, zw | 1 (middle button) |
| mouseButton4D | 4D rotation operation | xw, yw | 2 (right button) |
Rendering Control Settings
Most of the settings for the voxel renderer are in the app.renderer.core object. The core object is the core low-level voxel renderer object, independent of the four module. For example, to set the voxel opacity, you would write this:
app.renderer.core.setDisplayConfig({ opacity: 50 });However, since a voxel rendering controller, RetinaController, is added by default to most scenes, we only need to call the methods on the RetinaController directly. The recommended way to set opacity is like this:
app.retinaController.setOpacity(50);Although much of the code in the Tesserxel example library is written on the core object, it is not recommended to directly modify the rendering configuration in core here. This is because after the controller is initialized, it takes over the management of the renderer’s properties, and the RetinaController may update its parameters in the frame loop, overwriting these changes.
Other methods of the rendering controller:
| Method Call | Explanation |
|---|---|
| toggleStereo(stereo?: boolean) | Toggles stereo rendering mode (binocular disparity). The parameter is optional; omitting it will toggle the mode. |
| toggleCrosshair() | Toggles the aiming crosshair display. |
| setSectionEyeOffset(offset: number) | Sets the binocular distance for the section view (stereo effect intensity). |
| setRetinaEyeOffset(offset: number) | Sets the binocular distance for rendering 3D voxels. |
| setLayers(layers: number) | Sets the number of voxel rendering layers (more layers result in a more detailed image but are more performance-intensive). |
| setOpacity(opacity: number) | Sets the voxel opacity coefficient (can be greater than 1). |
| setCrosshairSize(size: number) | Sets the size of the aiming crosshair. |
| setRetinaResolution(value: number) | Sets the resolution for a single layer of voxel rendering. It’s best to use a power of 2 (higher values result in a clearer image but are more performance-intensive). |
| setRetinaSize(size: number) | Sets the display area size for voxel rendering. |
| setRetinaFov(fov: number) | Sets the field of view (FOV) for 3D voxel rendering. |
| setSize(size: GPUExtent3DStrict) | Sets the resolution of the final 2D canvas. |
The background color is not managed by the controller, so we set it here:
// The background color for the 4D scene set on the scene object, which is the background color of the 3D voxel canvas, where you can specify the opacity of the voxels
app.scene.setBackgroundColor([0.6, 0.8, 1, 0.01]);
// The background color set on the renderer object is for the 2D canvas; specifying opacity has no practical effect
app.renderer.setBackgroundColor([0,0,0]);
Controlling Opacity
We can specify opacity for the background color of the voxel canvas. In fact, the diffuse color of all object materials supports specifying opacity, which determines the opacity of the voxels during rendering. Due to GPU image format limitations, opacity must be between 0 and 1. To highlight certain objects in a scene and fade the background color, we can lower the opacity of other parts of the scene (e.g., to 0.01~0.1), set the opacity of the highlighted objects to 1, and then globally increase the opacity using retinaController.setOpacity to see the highlighted objects clearly. The setOpacity parameter can be set to a value between 5 and 100, depending on the situation.
What I want to say here is that sometimes we might want true 4D opacity—the ability to render semi-transparent 4D objects. Currently, Tesserxel’s rasterization engine does not yet support this feature (because its alpha channel is already used for blending voxel slice layers, not for blending objects in front of and behind each other in section rendering, leaving no other channel for this purpose), unless a method like ray tracing is used to composite the colors.
Material Texture Nodes
Currently, our object colors are all solid. How do we apply textures like in 3D graphics? 3D graphics surfaces require 2D textures, while 4D graphics surfaces require 3D textures. The problems with 3D textures are twofold: first, there is a lack of software to create them, and second, 3D voxel image files are huge and not convenient for network transmission. Therefore, 3D textures for 4D objects are generally procedurally generated. In the four module, we control material textures using a combination of material nodes, similar to software like Blender. For example, as we introduced before, PhongMaterial has three parameters: the first is color, and the other two are optional shininess and highlight color. In addition to direct numerical values, these parameters also support passing in corresponding types of node objects. Let’s look at a simple example: applying a 3D checkerboard texture to the floor. First, let’s recall the original solid color material syntax:
// Pure white Phong material, omitting the last two optional parameters
let material1 = new FOUR.PhongMaterial([1.0, 1.0, 1.0]);
We will replace the white [1.0, 1.0, 1.0] with a checkerboard texture node:
new FOUR.CheckerTexture(
    // The first two parameters are black and white, which can be assigned different voxel opacities
    [0, 0, 0, 0.5], [1, 1, 1, 1],
    // This parameter controls the texture coordinates
    new FOUR.UVWVec4Input,
)
In addition to the two color parameters, the checkerboard also has a texture coordinate parameter, which generally has two options:
UVWVec4Input: Uses the default texture coordinates that come with the model. We will discuss how to edit texture coordinates in a later article on modeling. All built-in shapes in thefourmodule have default texture coordinates. The default texture coordinates are 3D, and their w-component is always 0. The fourth coordinate is retained because it may be used for procedural 4D textures.WorldCoordVec4Input: Uses the scene’s world coordinates as texture coordinates. Depending on the specific position of the object, all four coordinates may have values.
The floor in the current scene looks like this. We find that its default texture coordinates only have two squares, which is too large. We could also try changing it to world coordinates, but that results in too many, too small squares. How do we scale the texture? Here, we introduceVec4TransformNode, which is a coordinate transformation node that accepts a coordinate input and anObj4coordinate transformation object.Obj4is an abstract coordinate transformation class composed of three parts: position, rotation, and scale. In fact, all objects in the scene withposition,rotation, andscaleproperties inherit from this class. Since we only want to scale the squares and don’t need to translate or rotate, we can usenullas a placeholder, or fill innew Vec4()andnew Rotor()as the default zero vector and no-rotation orientation:
let floorTexture = new FOUR.CheckerTexture(
    [0, 0, 0], [1, 1, 1],
    new FOUR.Vec4TransformNode(
        // Input the default cube texture coordinates
        new FOUR.UVWVec4Input,
        // Coordinate transformation syntax one:
        new tesserxel.math.Obj4(
            null,
            null,
            new tesserxel.math.Vec4(5, 5, 5, 5)
        )
        // Coordinate transformation syntax two: (equivalent to the one above)
        // new tesserxel.math.Obj4(
        //     new tesserxel.math.Vec4(),
        //     new tesserxel.math.Rotor(),
        //     new tesserxel.math.Vec4(5, 5, 5, 5)
        // )
    )
);
let floorMaterial = new FOUR.PhongMaterial(floorTexture);
Dynamic Color Material
An object’s material is compiled into fixed WGSL shader code that runs on the GPU during the first rendering. For dynamic color materials, if we re-assign a new material to the object every frame, compiling the material code each time will cause it to lag or crash. The correct approach is to introduce a more advanced material with variables that can be written to the GPU. For example, we’ll create a material with a color variable specifically for the second hypercube:
// Create a material color variable
let uniformColor = new FOUR.ColorUniformValue();
// Material 2 is a dynamic color with highlights bound to the color variable we just created
let material2 = new FOUR.PhongMaterial(uniformColor);
// Change the material of the second hypercube
let cubeMesh2 = new FOUR.Mesh(cubeGeometry, material2);
// ....other code remains the same
We will assign a value to the uniformColor variable later when creating the animation.
Animate the Scene
The app.run function’s parameter can accept a callback function, which will be executed during each frame rendering. We’ll implement the animation effects here:
// Generate a random seed for the animation
let t = Math.random() * 12345678;
app.run(() => {
    // Dynamically assign values to the GPU color variable in the material2 material, to create the color-changing effect on the hypercube on the right
    // We use simple sine and cosine functions with different frequencies and phases to achieve irregular fluctuations in RGB colors
    uniformColor.write([
        Math.sin(t) * 0.3 + 0.7,
        Math.sin(t * 0.91) * 0.5 + 0.5,
        Math.sin(t * 1.414) * 0.5 + 0.5
    ]);
    // Increment the time for the next frame
    t += 0.01;
});
Now let’s add some dynamic lighting. Note that in the “Hello Hypercube” example, we set the hypercube to force coordinate updates to achieve the animation effect, and the same applies to lights. These animation effects are all implemented using trigonometric functions.
let dirLight = new FOUR.DirectionalLight([0.1, 0.0, 0.0])
app.scene.add(dirLight);
let pointLight = new FOUR.PointLight([5.4, 2.5, 1.7]);
app.scene.add(pointLight);
let pointLight2 = new FOUR.PointLight([1.4, 12.5, 5.7]);
app.scene.add(pointLight2);
let pointLight3 = new FOUR.PointLight([1.4, 1.5, 15.7]);
app.scene.add(pointLight3);
// The following objects must be set for animation effects
// Tell Tesserxel to update their coordinates every frame
dirLight.alwaysUpdateCoord = true;
pointLight.alwaysUpdateCoord = true;
pointLight2.alwaysUpdateCoord = true;
pointLight3.alwaysUpdateCoord = true;
spotLight.alwaysUpdateCoord = true;
// Generate a random seed for the animation
let t = Math.random() * 12345678;
app.run(() => {
    // Normalize the vector with parameter t, then copy it to the spotlight's direction vector
    spotLight.direction.copy(
        new tesserxel.math.Vec4(
            Math.sin(t * 3), Math.cos(t * 3), Math.sin(t * 1.732), Math.cos(t * 1.732)
        ).adds(tesserxel.math.Vec4.y.mulf(6)).norms()
    );
    // After setting the position coordinates with trigonometric functions using the 'set' function, we then use the 'mulfs' function to modify their values, multiplying by an amplitude coefficient of 3.
    pointLight.position.set(Math.sin(t * 3), 0.5, Math.cos(t * 3), 0).mulfs(3);
    pointLight2.position.set(0, 0.5, Math.sin(t * 3), Math.cos(t * 3)).mulfs(3);
    pointLight3.position.set(Math.cos(t * 3), 0.5, 0, Math.sin(t * 3)).mulfs(3);
    // Alternatively, you can first assign the value, and then use the 'norms' function to modify it into a unit vector.
    dirLight.direction.set(
        Math.sin(t * 20), 0.2, Math.cos(t * 20) * 0.2, Math.cos(t * 20)
    ).norms();
    // ....the dynamic color material code from before
});
This complete example can be found in the Tesserxel Playground example scene under “More Scene Rendering Settings > Materials and Lighting”.
Introduction to Vector Operations
The animation in Scene 1 used many vector operation functions. I’ll list some common Vec4 vector operations here (the supported operations are far more than those listed; related documentation will be provided later). Let’s assume v1, v2, and v3 are Vec4 type variables, and k is a number type variable.
| Method Call | Explanation | Category |
|---|---|---|
| v1.add(v2) | Returns a new vector v1 + v2 | New vector |
| v1.adds(v2) | v1 += v2 | Modifies value |
| v1.addset(v2) | v1 = v2 + v3 | Modifies value |
| v1.sub(v2) | Returns a new vector v1 - v2 | New vector |
| v1.subs(v2) | v1 -= v2 | Modifies value |
| v1.subset(v2) | v1 = v2 - v3 | Modifies value |
| v1.neg() | Returns a new vector -v1 | New vector |
| v1.negs() | Modifies all components of v1 to their negative values | Modifies value |
| v1.dot(v2) | The dot product of v1 and v2, of type number |
/ |
| v1.norm() | The length of vector v1, of type number |
/ |
| v1.normSqr() | The square of the length of vector v1, of type number |
/ |
| v1.norms() | Modifies v1, normalizing it | Modifies value |
| v1.mulf(k) | Returns a new vector v1 * k; this multiplication is scalar multiplication | New vector |
| v1.mulfs(k) | v1 *= k; this multiplication is scalar multiplication | Modifies value |
| v1.divf(k) | Returns a new vector v1 / k; this division is scalar multiplication by 1/k | New vector |
| v1.divfs(k) | v1 /= k; this division is scalar multiplication by 1/k | Modifies value |
| v1.clone() | Generates a new vector with the same value as v1 | New vector |
| v1.copy(v2) | Modifies the value of v1 to be the same as v2 | Modifies value |
These functions can be divided into two main categories: those that create a completely new vector with no “side effects,” and those that modify the value without creating a new vector. The latter generally end with s (which can be understood as “assign” or “self”) or set. The main reason for the distinction is performance; for instance, in physics engines, a large number of vector operations are performed, and frequent creation of new objects can put a strain on memory allocation and garbage collection. In many scenarios, the performance bottleneck is not at all in vector operations, so for beginners, it is fine to choose either type once you understand the difference. However, if you need to perform a large number of vector operations on many objects in every frame (such as in the 4D physics simulation that will be introduced in the next article), you need to consider this. Here is an example of summing four vectors:
const Vec4 = tesserxel.math.Vec4; // Introduce shorthand

let v1 = new Vec4(1,2,3,4); // A vector object is generated here
let v2 = new Vec4(-1,2,-3,4); // Another vector object is generated
let v3 = new Vec4(4,3,2,1); // Another vector object is generated
let v4 = new Vec4(5,5,5,5); // Another vector object is generated
// Method one: (3 new objects are generated)
{
    // Each time the 'add' function is executed, it generates an additional vector object, so three more were generated here
    let sum1 = v1.add(v2).add(v3).add(v4);
    console.log(sum1);
}
// Method two: (1 new object is generated)
{
    let sum2 = v1.clone(); // A new vector object with the same value as v1 is generated through cloning
    sum2.adds(v2).adds(v3).adds(v4); // Only the value of sum2 is modified, no new objects are generated
    console.log(sum2);
}
// Method three: (1 new object is generated)
{
    let sum3 = new Vec4(); // A vector object is generated
    sum3.addset(v1,v2).adds(v3).adds(v4); // Only the value of sum3 is modified, no new objects are generated
    console.log(sum2);
}
// Method four: (0 new objects are generated, but the value of v1 is modified)
{
    // No new objects are generated, but the value of v1 is changed, which is unacceptable in some cases
    console.log(v1.adds(v2).adds(v3).adds(v4));
}
The next example is a dice whose orientation can be controlled by key presses. First, let’s introduce how to handle the rotation and orientation of 4D objects.
Introduction to Rotor Operations
Camera control, object orientation, and so on all require us to precisely describe and generate rotations. In Tesserxel, the rotation of a 4D object is not a matrix but a Rotor composed of two quaternions based on isoclinic decomposition. It can completely describe an object’s rotational orientation. For technical details, see the article 4D Computer Graphics: Rotation. Here are some basic usages.
Rotations can be inverted, and two rotations can be compounded into a new one. This corresponds to the following rotor operations:
const Rotor = tesserxel.math.Rotor; // Introduce shorthand
let r1 = new Rotor().randset(); // Randomly generate a rotation
let r2 = Rotor.rand(); // Can also be generated randomly from a static function of the Rotor class

let r3 = r1.conj(); // The inverse of a rotation corresponds to the conjugate operation of a rotor, which generates a new rotor
r1.conjs(); // Change the value of rotor r1 to its inverse

// r1 * r2 represents the compound rotation obtained by applying rotation r2 first, then r1
let r1_r2 = r1.mul(r2);
// The order of rotation affects the result, and there is no commutative property, so the corresponding 'muls' version must specify whether it is left-multiplication (l) or right-multiplication (r)
// Applying a rotation after r1, corresponding to left-multiplication
r1.mulsl(r2); // r1 = r2 * r1;
// Inserting a rotation before r1, corresponding to right-multiplication
r1.mulsr(r2); // r1 = r1 * r2;

r1.copy(r2); // Similar to vectors, modifies the value of r1 to be the same as r2
r1.clone(); // Similar to vectors, creates a new object with the value of r1
Applying Rotation
We use the rotation-related methods of the Vec4 class to get a new vector after a rotation is applied to it.
// Let v be a Vec4 object and r be a Rotor object
let v2 = v.rotate(r); // Creates a new vector whose value is the result of applying rotation r to vector v
v.rotates(r); // Directly modifies the value of v, applying rotation r

// Since inverse rotations are common in coordinate transformations, Tesserxel also provides some convenient operations
v.rotateconj(r);  // Creates a new vector whose value is the result of applying the inverse of rotation r to vector v
v.rotatesconj(r);  // Directly modifies the value of v, applying the rotation corresponding to the inverse of r

// The two lines above are equivalent to the two below, with the difference being that the 'conj' function below will each generate one extra Rotor object
v.rotate(r.conj());
v.rotates(r.conj());
Describing Rotations
Rotors are abstract; it is almost impossible to tell what a rotation is by looking directly at the two quaternions stored internally. For a camera, the most common way to set the orientation is with the lookAt method, which specifies that a certain direction should be aligned with a target direction through rotation.
// Generates a rotation that turns the positive x-direction to the positive y-direction; both parameters must be unit vectors
let r1 = Rotor.lookAt(Vec4.x,Vec4.y);
// Remember to normalize the general directions, otherwise the result will be incorrect
let r2 = Rotor.lookAt(new Vec4(1,2,3,4).norms(),new Vec4(5,4,3,2).norms());

// You can also use the 'lookAt' function directly on an Obj4 object
app.camera.position.set(1,2,3,4);
// Look at the origin. The camera's forward direction is the negative w-axis, which is the constant Vec4.wNeg
app.camera.lookAt(Vec4.wNeg,new Vec4());
In 4D space, describing a general rotation requires a plane and an angle. We introduce a 2-vector called Bivec, whose direction represents the rotation plane and whose magnitude represents the rotation angle. It is very similar to a regular vector. Here are some common operations:
const {Vec4, Bivec, Rotor} = tesserxel.math; // Can be imported in bulk for shorthand
let v1 = new Vec4(1,2,3,4);
let v2 = new Vec4(-1,2,-3,4);
// Generates a plane through the wedge product (exterior product) between vectors.
// After normalizing it with the 'norms()' function, multiply it by the angle in radians (30°)
// This is for a 30° rotation from the v1 direction towards the v2 direction
let bv = v1.wedge(v2).norms().mulfs(Math.PI/6);
// Similar to Vec4, the Bivec class also defines coordinate plane constants. These constants cannot be modified by value-modifying functions like 'mulfs'; you can only use side-effect-free functions that create new objects, such as 'mulf'
// The direction is a 30° rotation from the positive x-direction to the positive w-direction
let bv2 = Bivec.xw.mulf(Math.PI/6);
// The wx and xw directions have exactly opposite rotation directions
let bv3 = Bivec.wx.mulf(Math.PI/6);

// A 2-vector can also be acted upon by a Rotor object's rotation, just like a vector:
let bv4 = bv.rotate(r); // Creates a new 2-vector whose value is the result of applying rotation r to 2-vector bv
bv.rotates(r); // Directly modifies the value of bv, applying rotation r

// With a 2-vector, we use the 'exp' function to finally generate a rotor
let r = bv2.exp();
// You can also use 'expset' to avoid creating a new rotor object
r.expset(bv);

// You can also use the 'lookAtvb' function to set a rotation that turns a certain vector to fall within a specified plane. Both the vector and the 2-vector must be normalized.
let r1 = Rotor.lookAtvb(new Vec4(1,2,3,4).norms(),Bivec.xy);
Scene 2
Now let’s formally build the 4D dice scene. Although we can flexibly use a combination of nodes to achieve many materials, the four module actually does not have many built-in textures. Often, we need to write textures directly using the GPU shader language WGSL (WebGPU Shading Language) with WgslTexture.
WGSL Texture Example
First, let’s take a simple example: generating a texture with spherical spots to apply to the floor in Scene 1.
// Replace the original checkerboard material
let floorTexture = new FOUR.WgslTexture(
    `fn map(uvw:vec4f)->vec4f{
        if(length(fract(uvw)-vec4(0.5,0.5,0.5,0.0))<0.4){ return vec4f(1,0,0,1);}else{return vec4f(0,0,1,0.6);}
    }`,"map",
    // Same as the checkerboard, perform coordinate scaling
    new FOUR.Vec4TransformNode(
        new FOUR.UVWVec4Input,
        new tesserxel.math.Obj4(
            null,
            null,
            new tesserxel.math.Vec4(5, 5, 5, 5)
        )
    )
)
The first parameter of the WgslTexture constructor is a string of WGSL code, the second parameter is the entry function name of the WGSL code, and the third parameter is the texture coordinates. Now let’s add comments to the WGSL code we just saw: it defines a function with a vec4f input (texture coordinates) and a vec4f output (color). This function will be executed on each voxel (i.e., during the fragment stage of the rendering pipeline), coloring it point by point based on the coordinates. If you don’t understand the concepts of programmable rendering pipelines and shaders, please learn about them before continuing, or if you’re not interested in writing textures, you can jump directly to the Rotation Control section.
// fn is the keyword to define a function in WGSL
// vec4f is equivalent to Vec4 in Tesserxel
// The parameter type is after the colon, and the function return type is after the '->'
fn map(uvw:vec4f)->vec4f{
    // The fract function takes the fractional part of each component of the vector
    // This way, we map every integer grid in 4D space to the same grid
    // We compare the distance to the center of the grid (it's just a 3D texture, the fourth coordinate is 0) to determine if it's inside the sphere
    if(distance(fract(uvw.xyz),vec3f(0.5,0.5,0.5))<0.4){
        // Color it red if it's inside the sphere, giving it the highest voxel opacity
        return vec4f(1,0,0,1);
    }else{ // Note: In WGSL, single-line statements after 'if' and 'else' must be enclosed in curly braces; omitting them will cause an error
        // Color it blue if it's outside the sphere, and slightly lower the opacity
        return vec4f(0,0,1,0.6);
    }
}
WGSL is not a complex language. You can try this online Shadertoy-like website WebGPU Shader Toy. Additionally, Tesserxel’s example library includes a similar Shadertoy Voxel Editor in its developer examples, which has some examples that can help you understand WGSL syntax.
Interlude: A Brief Digression on Code Highlighting and Hexo Theme Updates
Here’s a brief digression. Long-time readers may have noticed a change in my website’s theme. It’s because while I was writing this series of articles, I found that Markdown didn’t support syntax highlighting for the WGSL language. I then searched online for how to add highlighting, but the configuration was always wrong. It just so happened that my old Hexo blog theme framework was too outdated and many things were no longer compatible. So, in a fit of frustration, I switched the theme framework to Fluid. I reconfigured the cover image and excerpt for each article, which took about a week. Fortunately, Fluid’s configuration is much simpler than the old theme, and switching to Prism directly fixed the WGSL code display.
4D Dice Texture
Now let’s start a new scene and learn about the default texture coordinates of a hypercube and how to use WGSL code to draw textures by creating a 4D dice. (Hint: The dot distribution on this dice is the design proposed by yugu233 in this video). A hypercube has eight cubic cell faces. The default texture coordinates are as follows: the first three coordinates of each cubic cell range from -1 to 1, while the fourth coordinate is numbered from 0 to 7 for the eight cells, and this coordinate remains constant on each face, always being the face’s index. Due to floating-point errors in the GPU, it’s not recommended to use equality operations to determine the face number. The code below uses uvw.w<0.5 to check for face 0, 0.5<uvw.w<1.5 to check for face 1, and so on. The code for drawing the spheres is straightforward: it uses the step function to compare the distance between the vector formed by the first three texture coordinates (obtained using xxx.xyz) and the center of a given sphere, and the radius (the step function returns 1 if the second parameter is greater than or equal to the first, and 0 otherwise). The resulting pattern variable serves to determine whether the pixel is part of the blank area of the dice or the spherical part where the dots should be drawn. Finally, we use the mix function to choose between a white background and the corresponding color based on the pattern variable.
const red = vec4f(1.0,0.0,0.0,1.0);
const blue = vec4f(0.0,0.0,0.8,1.0);
// Store different colors for dots 1-8 in a constant array
const arr = array<vec4f,8>(red,red,blue,blue,blue,red,blue,blue);
fn main(uvw:vec4f)->vec4f{
    var pattern:f32;
    // Use the w-component of the texture coordinates to determine which face it is, then use the spherical distance formula to check if it's within a dot's shape
    // For example, face 0 is a sphere with a radius of 0.5 located at the origin
    if(uvw.w<0.5){pattern=step(length(uvw.xyz),0.5);}
    else if(uvw.w<1.5){pattern=step(distance(uvw.xyz,vec3<f32>(0.35,0.35,0.35)),0.28)+step(distance(uvw.xyz,vec3<f32>(-0.35,0.35,-0.35)),0.28)+step(distance(uvw.xyz,vec3<f32>(0.35,-0.35,-0.35)),0.28)+step(distance(uvw.xyz,vec3<f32>(-0.35,-0.35,0.35)),0.28)+step(distance(uvw.xyz,vec3<f32>(0.35,0.35,-0.35)),0.28)+step(distance(uvw.xyz,vec3<f32>(-0.35,0.35,0.35)),0.28)+step(distance(uvw.xyz,vec3<f32>(0.35,-0.35,0.35)),0.28)+step(distance(uvw.xyz,vec3<f32>(-0.35,-0.35,-0.35)),0.28);}
    else if(uvw.w<2.5){pattern=step(distance(uvw.xyz,vec3<f32>(0.38,0.38,0.38)),0.28)+step(distance(uvw.xyz,vec3<f32>(-0.38,-0.38,-0.38)),0.28)+step(length(uvw.xyz),0.28);}
    else if(uvw.w<3.5){pattern=step(distance(uvw.xyz,vec3<f32>(0.35,0.35,0.35)),0.28)+step(distance(uvw.xyz,vec3<f32>(-0.35,0.35,-0.35)),0.28)+step(distance(uvw.xyz,vec3<f32>(-0.35,-0.35,-0.35)),0.28)+step(distance(uvw.xyz,vec3<f32>(0.35,-0.35,0.35)),0.28)+step(distance(uvw.xyz,vec3<f32>(0.46,0.0,-0.46)),0.28)+step(distance(uvw.xyz,vec3<f32>(-0.46,0.0,0.46)),0.28);}
    else if(uvw.w<4.5){pattern=step(distance(uvw.xyz,vec3<f32>(0.35,0.35,0.35)),0.28)+step(distance(uvw.xyz,vec3<f32>(-0.35,0.35,-0.35)),0.28)+step(distance(uvw.xyz,vec3<f32>(0.35,-0.35,-0.35)),0.28)+step(distance(uvw.xyz,vec3<f32>(-0.35,-0.35,0.35)),0.28)+step(length(uvw.xyz),0.28);}
    else if(uvw.w<5.5){pattern=step(distance(uvw.xyz,vec3<f32>(0.35,0.35,0.35)),0.28)+step(distance(uvw.xyz,vec3<f32>(-0.35,0.35,-0.35)),0.28)+step(distance(uvw.xyz,vec3<f32>(0.35,-0.35,-0.35)),0.28)+step(distance(uvw.xyz,vec3<f32>(-0.35,-0.35,0.35)),0.28);}
    else if(uvw.w<6.5){pattern=step(distance(uvw.xyz,vec3<f32>(0.38,0.38,0.38)),0.28)+step(distance(uvw.xyz,vec3<f32>(-0.38,0.38,-0.38)),0.28)+step(distance(uvw.xyz,vec3<f32>(-0.38,-0.38,-0.38)),0.28)+step(distance(uvw.xyz,vec3<f32>(0.38,-0.38,0.38)),0.28)+step(distance(uvw.xyz,vec3<f32>(0.46,0.0,-0.46)),0.28)+step(distance(uvw.xyz,vec3<f32>(-0.46,0.0,0.46)),0.28)+step(length(uvw.xyz),0.28);}
    else if(uvw.w<7.5){pattern=step(distance(uvw.xyz,vec3<f32>(0.35,0.35,0.35)),0.3)+step(distance(uvw.xyz,vec3<f32>(-0.35,-0.35,-0.35)),0.3);}
    // Select the background or dot color based on the previous calculation result
    return mix(vec4f(1.0,1.0,1.0,0.1),arr[u32(uvw.w+0.5)],pattern);
}
Note: In the last return line, the array index is of type 32-bit unsigned integer (u32). The u32(..) function here forces the floating-point number (f32) to be converted to u32. The conversion process is floor-based, so 0.5 is added to ensure no numerical errors occur.
The code for creating the dice Geometry, Mesh, and scene lighting will not be repeated here. After setting up the texture, we can place the camera a bit farther away, put the hypercube dice directly at the origin, and use the object-mode TrackBallController to control it.
app.camera.position.w = 3;
// This time, we don't control the camera but the dice itself. The second parameter is set to 'false', indicating object control mode
app.controllerRegistry.add(new tesserxel.util.ctrl.TrackBallController(dice_mesh, false));
Custom Keyboard Controller
Now we’ll customize a keyboard controller. Combining what we just learned about rotation settings, we’ll implement a feature that allows switching the 4D dice’s angle by pressing number keys 1 through 8, so that each of these dots faces the camera directly.
First, all controllers must implement the update function from the util.ctrl.IController interface. The parameter is the state object maintained by the ControllerRegistry, which allows us to easily get current keyboard information:
// This is TypeScript code. In JavaScript, you can simply remove `implements tesserxel.util.ctrl.IController`
class DiceCtrl implements tesserxel.util.ctrl.IController {
    // In this class, you only need to know that it is an Obj4 object. In fact, it is a four.Mesh object that inherits from Obj4
    // In JS, you don't need to specify types, so this line can just be `dice;` and the same applies later
    dice: tesserxel.math.Obj4;
    constructor(dice: tesserxel.math.Obj4){
        this.dice = dice;
    }
    update(state) {
        if(state.isKeyHold("Digit1")){
            // (code to switch to dot 1)
        }
        if(state.isKeyHold("Digit2")){
            // (code to switch to dot 2)
        }
        // ....
    }
}
// Then we register this controller
app.controllerRegistry.add(new DiceCtrl(dice_mesh));
Now let’s write the specific rotation logic: After the scene loads, you can see that the dot for number one is on the left, which means it’s facing the negative x-semiaxis. The dice is at the origin, and the camera is on the positive w-semiaxis. Therefore, we can directly use the lookAt function to rotate the negative x-direction to the positive w-direction, which will make it face the camera. We just need to assign this rotor to dice_mesh.rotation; the same logic applies to the other faces.
update(state) {
    if(state.isKeyHold("Digit1")){
        // Dot 1 is at the negative x-semiaxis, rotate it to the forward w-direction
        this.dice.rotation.setFromLookAt(Vec4.xNeg,Vec4.w);
    }
    if(state.isKeyHold("Digit2")){
        // Dot 2 is at the positive y-semiaxis, rotate it to the forward w-direction
        this.dice.rotation.setFromLookAt(Vec4.y,Vec4.w);
    }
    // .... The rest are similar
}
Here’s a quick note on the details of the lookAt algorithm:
- The dice’s default orientation is with dot 5 facing the camera, which corresponds to an initial state that requires no rotation. That is,
xxx.setFromLookAt(Vec4.w, Vec4.w)is equivalent toxxx.set(); - Dot 4 is facing away from the camera. Executing
xxx.setFromLookAt(Vec4.wNeg, Vec4.w)will perform a 180° rotation, but around which plane? There are actually an infinite number of solutions, and Tesserxel will arbitrarily choose one to execute. If you want precise control, please use a 2-vector to specify the rotation, e.g.,xxx.expset(Bivec.xw.mulf(Math.PI)). - The
lookAtfunction directly generates a rotation from start to finish in one go. Creating a transitional rotation animation requires a different method. - Another small detail about rotation alignment: The rotations we’ve set so far are hardcoded, generated from the dice’s default orientation to the camera’s direction. If the orientation is already aligned, a different spin orientation of the object will still be realigned, which is not the minimal rotation, as shown in the image below:
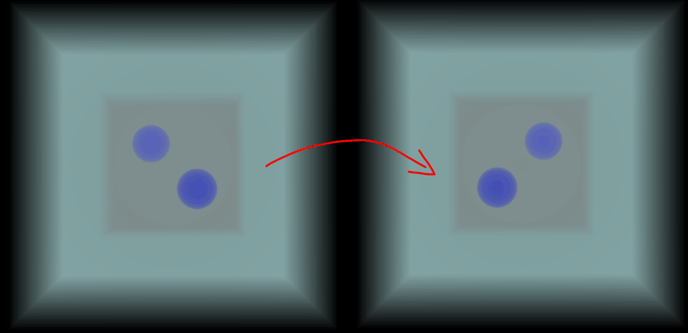 Now let’s address the issues of transitional animation and minimal rotation alignment in order.
Rotational Transitional Animation
Although we can now switch between dot positions, it’s too abrupt. Let’s add a rotational transitional animation. The basic idea is this: given a target Rotor value, let the current rotation “advance” a little bit towards that target in each frame using the rotational interpolation function Rotor.slerp, achieving a smooth transition.
For this, we introduce an internal target variable to represent the goal. We set it to null initially and after the animation is complete. When a key is pressed, we simply set the target. In each frame, we check if the current rotation is close to the target to either execute or complete the transitional animation.
class DiceCtrl implements tesserxel.util.ctrl.IController {
    dice: tesserxel.math.Obj4;
    // Introduce the target for the rotational transitional animation
    target: tesserxel.math.Rotor = null;
    update(state) {
        // Advance 1/5 of the way towards the target each time; the larger the value, the shorter the transitional animation
        const dampFator = 0.2;
        if(state.isKeyHold("Digit1")){
            // Note that the target can be null, so you can't use setFromLookAt directly; you must create a Rotor.
            this.target = Rotor.lookAt(Vec4.xNeg,Vec4.w);
        }
        // ... Omit other key presses
        if(this.target){
            // Generate a rotation that starts from this.dice.rotation and goes towards the target, but only rotates 1/5 of the way
            this.dice.rotation = Rotor.slerp(this.dice.rotation, target, dampFator);
            // The distanceSqrTo function returns the square of the distance, which avoids an expensive square root operation
            if(this.dice.rotation.distanceSqrTo(target) < 1e-6){
                // If it is very close to the target, stop the animation
                this.target = null;
            }
        }
    }
}
Minimal Rotation Alignment
To achieve minimal rotation alignment that allows for freedom of spin, we cannot generate the rotation from the dice’s default starting point. Instead, we must use the dice’s current orientation information for alignment. Temporarily ignoring the transitional animation, the specific approach is to find the direction of each dot’s position under the current orientation, and then align it with the y-axis:
update(state) {
    if(state.isKeyHold("Digit1")){
        // Dot 1 is at the negative x-semiaxis by default, but has now been rotated to the currentDir position by the dice's rotation
        const currentDir = Vec4.xNeg.rotate(this.dice.rotation);
        // Generate a rotation r that turns currentDir to face forward
        const r = Rotor.lookAt(currentDir,Vec4.w);
        // Then, on top of the dice's existing rotation, perform rotation r to get the dice's final orientation
        // mulsl is a left-multiplication assignment operation, i.e., rotation = r * rotation; the rotation composition order is from right to left
        this.dice.rotation.mulsl(r);
    }
    if(state.isKeyHold("Digit2")){
        // Likewise, only the initial position is changed
        const currentDir = Vec4.y.rotate(this.dice.rotation);
        const r = Rotor.lookAt(currentDir,Vec4.w);
        this.dice.rotation.mulsl(r);
    }
    // .... The rest are similar
}
Now, if we run the code again, we can preserve the spin freedom. However, this also introduces a problem: as long as the corresponding cell of the dice is facing forward, its other orientations can be quite arbitrary. If you still want to align the horizontal and vertical directions, you need to introduce other directions and align them to the nearest one. The logic for this is a bit more complex, so I won’t elaborate on it here.
Minimal rotation alignment can also be used to create a transitional animation. I’m sure readers who have gotten this far are capable of taking on the challenge of transitional animation. The specific code can be found in the Tesserxel Playground example scene under “More About Scene/Render > Dice Drawing & Ctrl”.