Play Tesserxel (I): View Control
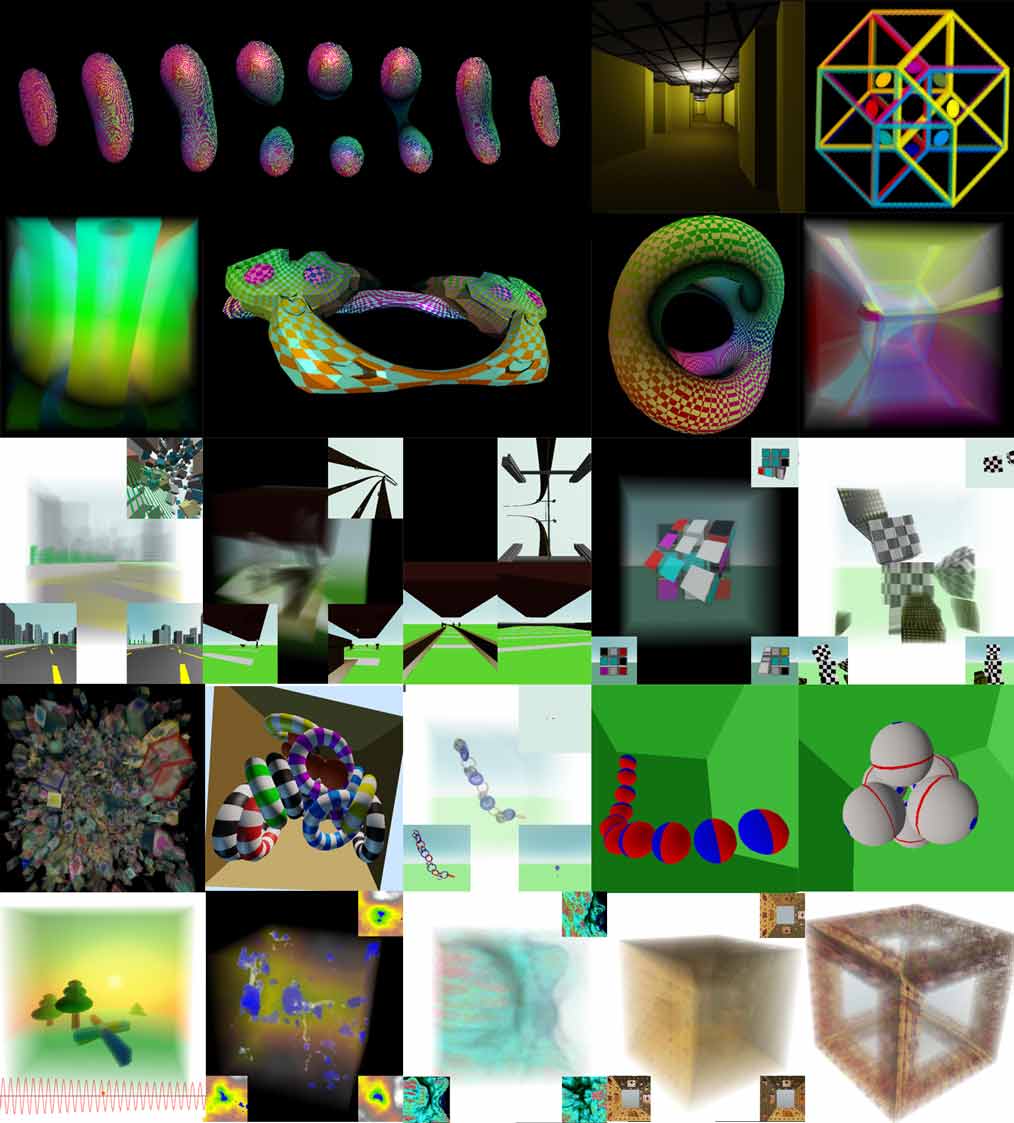
Google Chrome browser finally officially started supporting WebGPU in version 113 (at least I can now automatically update to this version on Windows, but I found that version 113 sometimes had a bug where objects would disappear and not render after a while, which has been fixed in later versions)! This means that my Tesserxel 4D engine project can run directly on the latest version of the Chrome browser. I will start a Tesserxel tutorial series to explain the scenes in the Tesserxel examples.
To play Tesserxel, you first need to know the basic concepts of 4D space, then please read the articles “4D World (IV): Vision of 2D Beings“ and “4D World (V): 4D Vision and Orientation“. These articles explain concepts such as stereo photos, cross-sections, and 4D depth. The interactive 4D scenes in the articles, aside from using the previous generation WebGL engine, have essentially the same interaction methods as Tesserxel, with only minor adjustments to the shortcut keys. So if you’ve played with some 4D scenes before, getting started with Tesserxel is zero-difficulty. Note that to intuitively grasp abstract 4D space, in addition to a slightly better graphics card, you also need to engage as many sensory interactions as possible, which is why Tesserxel is not designed for mobile operation. Since many operations are the same as the old engine, I won’t go into details about camera movement, rotation, and simple direction recognition here. This article focuses on operations related to 3D voxel photo rendering settings and lists common camera control methods.I’ll start by providing a shortcut key map for your reference, and the specific meanings will be explained later in this article. Note that not all functions in the shortcut map are available in every scene; it depends on the camera’s control method. (September 2023 Update: Tesserxel has been updated to include a settings button for adjusting rendering settings, so you don’t need to memorize the blue-colored rendering shortcuts, but you still need to learn the basic camera translation keyboard operations)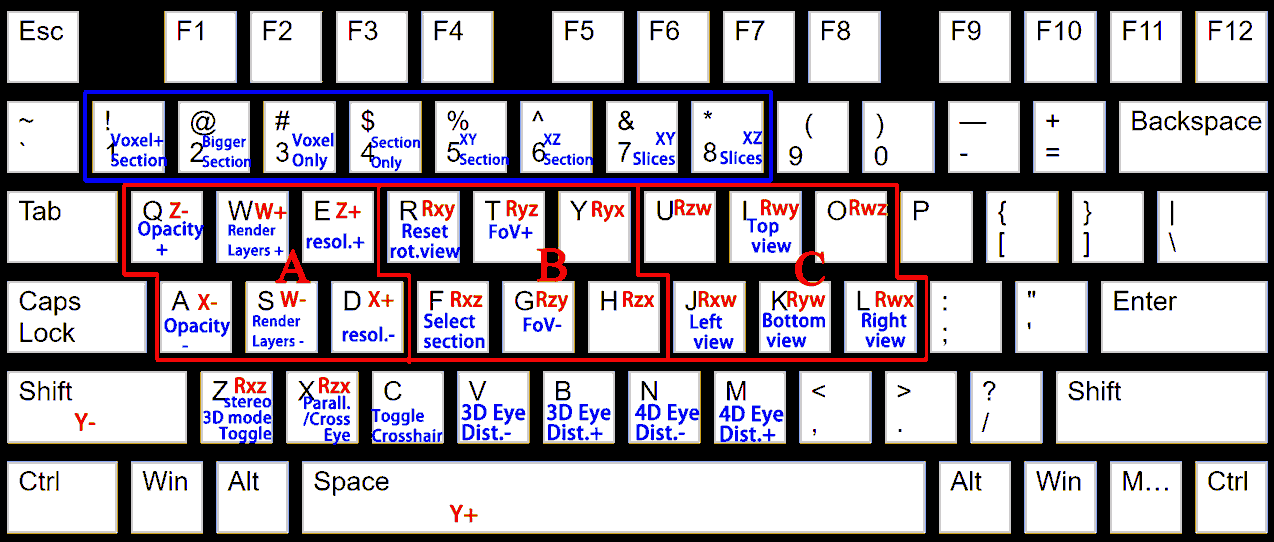
Click here to enter the example library. If you see these lines of text, you should download the latest version of Google Chrome or the Canary version of Google Chrome, see here.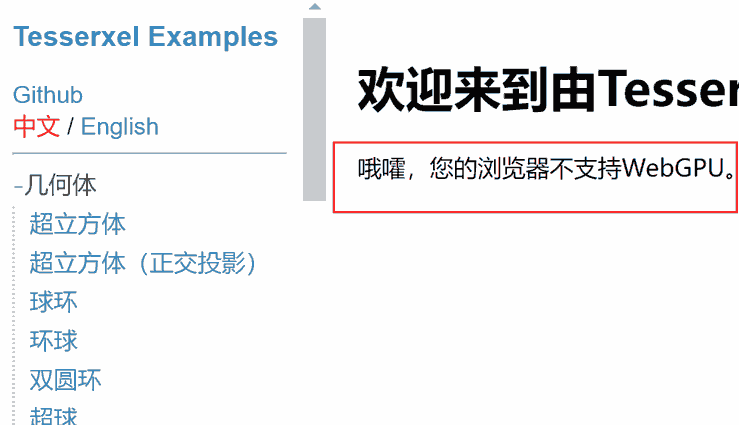
Next, let’s click on the sidebar to look at the first “hypercube” 4D scene: a hypercube with a sphere drawn at the center of each of its 8 cells. This scene has been introduced before: scrolling the mouse wheel lets you “drill out” from inside the hypercube to see its outer surfaces. If you adjust the angle well, you can see up to four faces at the same time! A reminder: the camera control for this scene only requires the left, middle, and right mouse buttons, not the keyboard.
Note: The first time you enter, there may be a one- or two-second white screen while the Tesserxel library is downloaded and shaders are compiled.
The first few examples in the sidebar are all geometric shapes. If you are not deeply interested in 4D geometry, you can go straight to the more complex 4D scene examples. If you still find these scenes hard to understand, don’t worry, I will analyze what each scene is in the next article. Note that the camera control methods vary for different scenes; generally, there are three types:
- Scenes labeled “Control: Trackball Mode“ use the mouse left, middle, and right buttons to drag and rotate, and the scroll wheel to zoom, just like the first “hypercube” 4D scene.
- Scenes labeled “Control: Upright Mode“ can keep the horizontal cell (the analogy of a horizontal plane) seen by the camera always parallel to the vertical direction. Use the keyboard Q/E/W/S/A/D/Space/Left Shift to translate the camera, and U/O/I/K/J/L to rotate the camera (turn). Moving the mouse/scroll wheel can also rotate the camera in the same three directions. Finally, the keyboard Z/X can perform a “self-rotation” while keeping both the upright and forward directions unchanged.
- Scenes labeled “Control: Free-flight Mode“ have the same camera controls as the Upright mode, but also add three sets of 3D rotation operations (only rotating the 3D view): R/Y/T/G/F/H; note that F/H are actually the same as Z/X.
The 4D fractal scenes use this control method.
The translation and rotation directions corresponding to the three keyboard groups above are written in red in the first keyboard map in this article. You can refer to the following diagram for the specific direction coordinates: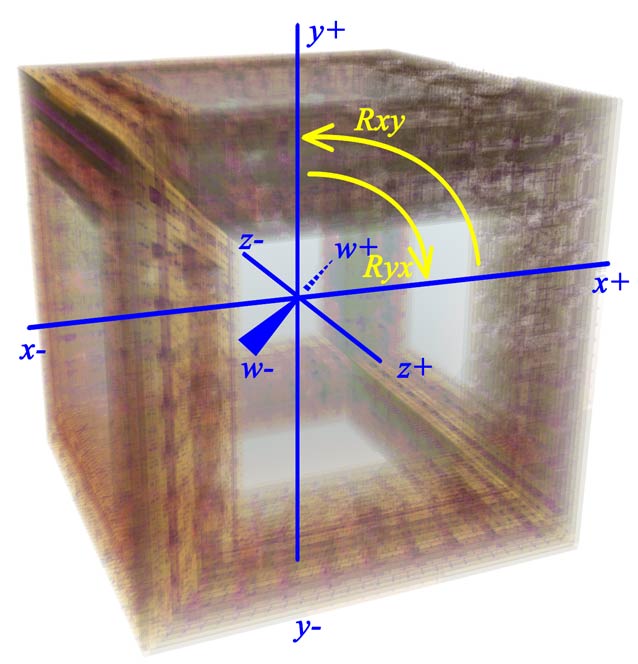
If you don’t understand these directions, especially the many rotation directions, just try operating them yourself and you’ll figure it out! In short, each 3x2 area in the ABC group on the shortcut key map corresponds to an operation with three degrees of freedom (group A for horizontal translation, group B for 3D rotation, and group C for 4D turning). If you still don’t understand, then here’s a saying for you: Don’t try to understand it. Feel it.
Special operations in other scenes will be described in the explanations at the bottom of the sidebar. Here are a few examples:
- In many physics scenes, you can use the left mouse button to launch hyperspheres to interact with objects by bombardment.
- In the two train scenes, you can use the keyboard T/G to operate the train’s movement and turning.
3D Voxel Photo Rendering Settings
A real 4D person actually sees a 3D voxel photo that can show all pixels simultaneously without overlapping and without semi-transparent pixels. For our 2D eyes to capture these details, we need to put effort into 3D voxel photo rendering. All shortcut keys for 3D voxel photo rendering settings require holding down the Alt key; these shortcuts are marked in blue in the first keyboard map in this article. You can also click the gear button on the right edge of the screen to expand the settings menu, where the functions are the same as those achieved with the shortcuts.
Note: The previous operations were for controlling the 4D camera, which means the content of the 3D voxel photo would change, while the operations in this section, holding the Alt key, only change the rendering settings of the stereo photo. They do not affect the “substance” of the 3D view as a “4D creature” would see it.
Naked-eye 3D settings
Naked-eye 3D is enabled by default. If you don’t know how to see it and want to turn it off, press Alt+Z to toggle it.
For the specific meaning of naked-eye 3D depth, please be sure to read here! Because the depth in the section is in a different direction from the depth of the 3D photo.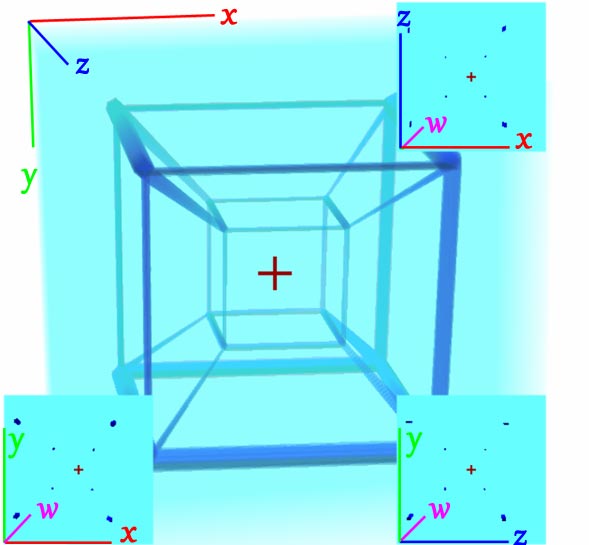
Note: The default is cross-eyed. To switch to parallel-eyed viewing, use the shortcut Alt+X.
Adjustment for stereo offset in the 3D view: Alt+V and Alt+B. This adjusts the rotation angle of the left and right 3D photos.
Adjustment for 4D stereo offset of sections: Alt+N and Alt+M. This adjusts the distance between the two cameras corresponding to the left and right eyes in the 4D scene.
View configurations
- Alt+1: Defaults to 3D voxel photo + three cross-sections passing through the center of the view.
- Alt+2: Same as above, but the sections are displayed larger.
- Alt+3: Only displays the 3D voxel photo, turns off section display.
- Alt+4: Only displays three cross-sections passing through the center of the view, turns off the 3D voxel photo.
- Alt+5: Only displays a full-screen XY-plane cross-section passing through the center of the view.
- Alt+6: Only displays a full-screen XZ-plane cross-section passing through the center of the view.
- Alt+7: Displays the 3D voxel photo and a series of cross-sections parallel to the XY plane.
- Alt+8: Displays the 3D voxel photo and a series of cross-sections parallel to the XZ plane.
( I’ve found a strange bug: having Photoshop open prevents the browser from capturing the number keys when the Alt key is held down! )
3D Voxel Photo Orientation Control
Hold the Alt key and drag the mouse to rotate the 3D voxel photo. (Alt+arrow keys can also rotate the 3D voxel photo, this is not on the shortcut map). You can quickly switch to top, left, right, and bottom views using the shortcut keys Alt + I/J/K/L. Hold the Alt key and scroll the mouse wheel to zoom in and out. However, the 3D voxel photo is essentially the “display” of a 4D person. Rotating the display will make it difficult to recognize directions in the 4D world, so we need to press Alt+R to restore the 3D voxel photo’s rotation (to straighten the display again). If you really want to rotate the view, you can rotate the camera in the 4D scene, for example, by pressing Z/X (or RTYFGH keys in free-flight mode). These can also change the angle of the 3D voxel photo without rotating the 3D display itself.
What’s the difference between rotating the photo and rotating the camera? Refer to the 2D analogy below: it will affect the direction in which you control the camera later. For example, if you rotate the 3D voxel photo 90 degrees around the y-axis (the vertical axis), the camera’s left/right movement, originally controlled by the A/D keys, will now appear to be a ana/kata movement. It is recommended that if you want to observe from another angle temporarily, you should rotate the display and restore it promptly. When operating the camera’s position in 4D space, the rotation angle of the 3D display should not exceed 45 degrees, to avoid confusion about the real control directions.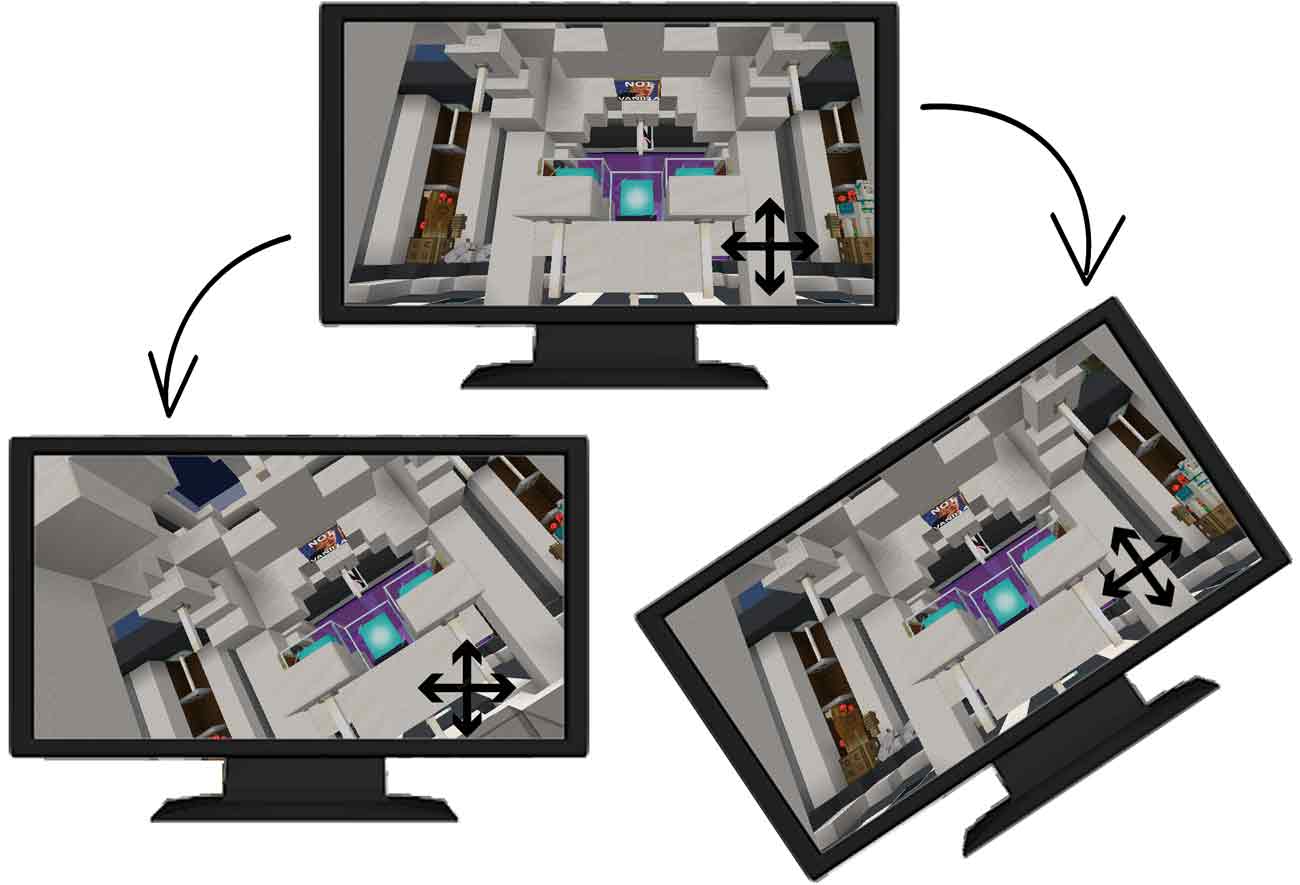
Perspective field of view for 3D voxel photo: Alt+G and Alt+T. We can use this set of shortcuts to choose between orthogonal or perspective projection to view the 3D voxel photo, and to adjust the perspective field of view.
Section Shape Settings
Why is a 4D person’s field of view a cube instead of a sphere? Also, with so many voxels in the 3D voxel photo, what can I do if I want to cut it open to see only the voxels inside, and get rid of the obstruction from the outer colors? The section shape settings for the 3D voxel photo are for this purpose. Repeatedly press Alt+F to switch between the following modes:
- Default Cube: All voxels are fully displayed;
- Sphere: Alt+right-click drag can change some properties: dragging left and right changes the feathering size, dragging up and down changes the size of the sphere;
- Small Cube: Alt+right-click drag can change some properties: dragging left and right changes the transparency of the voxels outside the small cube to be ignored, dragging up and down changes the size of the small cube;
- Plane (actually a half-space): Alt+right-click drag can rotate the position of the section plane.
Rendering Image Settings
- 3D Voxel Photo Transparency: Control voxel transparency with Alt+Q/Alt+A. (When the transparency is low, you might see some circular artifacts; this seems to be a floating-point precision bug.) It is recommended to adjust transparency to a moderate level; if it’s too low, everything will be blurry and hard to see; if it’s too high, you’ll only see the voxels on the surface and not those inside the center of the 3D voxel photo.
- Crosshair: Turn on or off with Alt+C. When naked-eye 3D is enabled, it will be located at the very center of the cube display, which is very useful when moving straight towards a target, otherwise it’s difficult to know the central position of the 3D image content on the z-axis.
Rendering Quality Settings
Note, the following two settings will significantly affect the frame rate. Be cautious with these adjustments if you have a lower-spec computer!
- 3D Voxel Photo Rendering Layers: Alt+W and Alt+S to adjust. Voxels use slice rendering, so changing the number of layers changes the Z-axis resolution. Note: More layers will result in a slower frame rate.
- 3D Voxel Photo Rendering Resolution: Alt+E and Alt+D to adjust. This is the 2D resolution of each slice of the voxel, i.e., the resolution in the XY directions. Note: Higher resolution will result in a slower frame rate, which is especially noticeable in scenes like fractals that require a large amount of point pixel calculations.
Alright, these are the operation methods for the Tesserxel example library. Next, we will specifically introduce each 4D scene. I will share my preferred interaction methods for 4D objects and tips for playing Tesserxel, scene by scene.