Minecraft4D Tutorial
(This article is only a tutorial, so it’s not included in the “4D World” series.)
Minecraft4D is a true four-dimensional (hypercube-based) voxel sandbox game. (If you include time, it’s actually in 5D spacetime!) Currently, the game only supports single-player creative mode. Minecraft4D is written in Javascript and WebGL, so you can play just by clicking the link below. (Best used with Google Chrome; compatibility with other browsers is not guaranteed, and it requires a keyboard.)
Minecraft4D
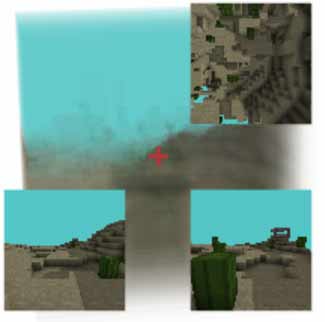
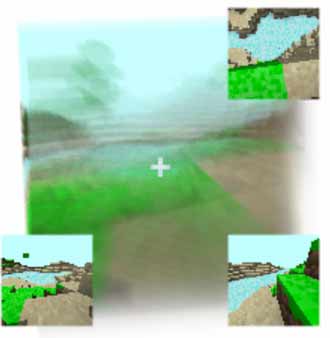
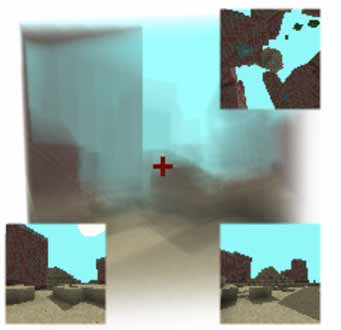
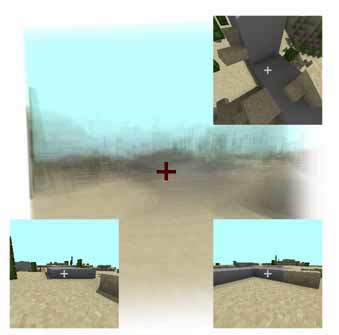
After entering, wait for the textures and terrain to fully load, and then you’ll see the view. You’ll notice that the screen is split into two nearly identical halves — these are the images for your left and right eyes, meant to create stereoscopic vision. Since I don’t know how to make VR, you’ll need to use cross-eyed viewing to perceive the 3D image. If you can’t do that, then rotate the view using the arrow keys to get a sense of depth. This article has a detailed explanation of how to view stereoscopic images. The three small corner windows are stereo vision cross-sections, separated for clearer observation.
Q: What is stereoscopic vision? How do I view it? (Click to expand/collapse)
4D beings can directly perceive solid 3D structures, so the solid cube view here is made transparent to allow internal observation. If you’re still confused, check out the following articles:
Direction Controls
Let’s learn about directions in four-dimensional space. The image below shows the name of each direction. You can try moving with the keys W S A D Q E. Note that forward and backward directions are not shown in the image — they are perpendicular to the 3D view and can’t be drawn. Moving along the ana and kata directions may feel odd at first, since our 3D brains haven’t developed an intuitive sense of the fourth dimension, but you’ll get used to it soon.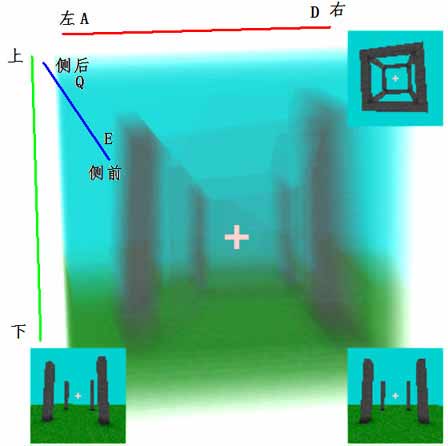
Because the transparent cube view overlaps many colors, it can be hard to see clearly. So, as shown below, some cross-sections are extracted and color-coded:
($x$: left-right; $y$: up-down; $z$: ana-kata; $w$: forward-backward)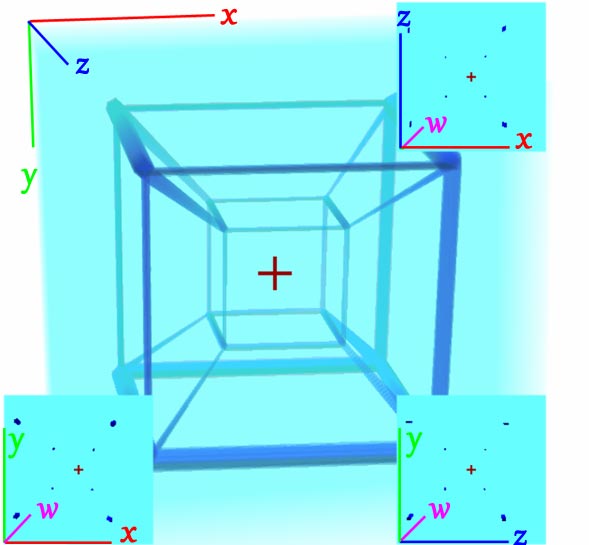
These stereo vision cross-sections provide depth along the $w$ axis (perpendicular to the 3D view) as a compromise to simulate 4D perception.
After clicking the screen, the mouse will be hidden and mouse movement will rotate the view; press Esc to exit this mode — similar to vanilla Minecraft. Mouse movement left/right rotates the player’s head left/right; unlike vanilla Minecraft, up/down mouse movement rotates in the ana-kata direction, so the player always faces forward. To look up/down, scroll the mouse wheel or press I / K.
World Controls
There are two types of worlds: normal (default) and superflat. Each time you enter, a random seed is used. Use /seed to view the current seed.
To enter superflat mode, append ?flat to the URL. This mode generates no additional structures.
Example seeds:
- Superflat: ?flat
- At x=-510 z=-230 w=-440: pyramid, stone beach, river, village (TP manually): ?873556
- At x=34 z=72 w=64: riverside village: ?962259
- At x=160 z=-61 w=284: observatory in village: ?661280
To save a world after editing, press / to open the command bar and enter /save (saves as a .mc4a file locally).
To load a save, enter any world (seed/type doesn’t matter) and run /open to load a local .mc4a save.
Minecraft4D has a time system. If it’s too dark at night (lighting isn’t supported yet), use /skipnight or /skip to skip the night. See the Command List for more.
Block Controls
Like vanilla Minecraft, Minecraft4D uses right-click to place, left-click to destroy, and middle-click to select blocks. Note: the center crosshair is in 3D space, so you must align it correctly to select a block.
Use N and M to switch held blocks. Full block list is here.
Since 4D space is vastly larger than 3D, building by hand requires far more blocks. So Minecraft4D includes WorldEdit-like features. Use /w to toggle wand mode. Only tetracuboid (tesseractoid) selections are currently supported. Use left/right click to select two diagonal corners to define a tetracuboid region. You can also use /pos1 and /pos2 for precise coordinates. Use /sel to view selection info. Use /set <block> to fill the selection. (Block names: see here). More commands: see here.
Shortcut Keys
Shared with other 4DViewer apps
Rendering & Display
| Key | Action |
|---|---|
= |
Increase 3D view layers |
- |
Decrease 3D view layers |
] |
Increase 3D voxel opacity |
[ |
Decrease 3D voxel opacity |
; |
Shrink cross-section |
' |
Enlarge cross-section |
, |
Darken background |
. |
Brighten background |
9 |
Reduce FOV |
0 |
Increase FOV |
C |
Wireframe mode |
Alt+[ |
Wireframe mode |
Alt+, |
Decrease resolution |
Alt+. |
Increase resolution |
Alt+1 |
Use default rendering preset |
Alt+2 |
Use preset for 3D retina (No cross-section, more layers and low resolution) |
Alt+3 |
Use preset for cross-sections (No 3D voxel retina, big cross-section) |
| Arrow keys | Rotate 3D view |
Player / Camera
| Key | Action |
|---|---|
W |
Move Forward |
S |
Move Backward |
A |
Move Left |
D |
Move Right |
Q |
Move Kata |
E |
Move Ana |
Shift |
Descend (fly mode) |
Space |
Jump / Ascend |
I |
Look up |
K |
Look down |
J |
Look left |
L |
Look right |
U |
Look kata |
O |
Look ana |
Z |
Rotate (CW Spin) |
X |
Rotate (CCW Spin) |
Minecraft4D-specific
| Key | Action |
|---|---|
M |
Previous block |
N |
Next block |
/ |
Open command bar |
P |
Pause / Resume |
Command List
| Command | Format | Description |
|---|---|---|
| /tp | tp <x> <y> <z> <w> | Teleport player (use prefix ~ to indicate relative position) |
| /seed | seed | Show the seed of the current world |
| /fly | fly | Toggle fly mode |
| /speed | speed <speed> | Set speed of player |
| /dayspeed | dayspeed <speed> | Set day-night cycle speed |
| /skipnight or /skip | skipnight| skip | Skip the night (can only be used at night) |
| /save | save [clipboard| clip| sel| selection] | Save the world to local file without parameter, and use parameter to save the specified contents (e.g. save clipboard) into a schematic4d file |
| /open | open | Open local world file |
| /load | load [-c| clip| clipboard] | Load local schematic4d file. By default the structure will be loaded immediately relative to player. Use option -clipboard to load into clipboard rather than in the world |
| /loadmacro or /macro | loadmacro| \macro [prev] | Load local Macro file, use macro prev to execute the last macro |
| /regen | regen <me|all> | regen me: Regenerate the current chunk according to the seed; regen all: Regenerate the world completely |
| /chunks | chunks | Show total loaded chunks and modified chunks (modified chunks cannot be unloaded) |
| /wand or /w | wand| w | Toggle WorldEdit wand mode |
| /pos1 | pos1 <x> <y> <z> <w> | Set first vertex of tetracuboid selection area (use prefix ~ to indicate relative position) |
| /pos2 | pos2 <x> <y> <z> <w> | Set second diagonal vertex of tetracuboid selection area (use prefix ~ to indicate relative position) |
| /sel | sel | Check current selection infomation |
| /set | set <id> | fill the selection with a specified block type by block id |
| /hset | hset <id> | fill the surface of the selection with a specified block type by block id |
| /wall | wall <id> | fill the surface of the selection except ceil and floor with a specified block type by block id |
| /hwall | hwall <id> | fill the vertical 2D frames of the selection with a specified block type by block id |
| /copy | copy | Copy the current selection into clipboard. Your relative position will be stored like in original WordEdit |
| /paste | paste | Paste the clipboard to the world, the position is relative to the player |
| /flip | flip [dir] | Flip the clipboard toward direction dir (e.g. x, y, z or w). The default direction is front |
| /stack | stack <num> [dir] | Stack the current selection num times toward direction dir(e.g. x+, z-, f for front, u for up, d for down). The default direction is front |
| /move | move <num> [dir] | Move the current selection num blocks toward direction dir(e.g. x+, z-, f for front, u for up, d for down). The default direction is front |
| /shift | shift <num> [dir] | Move only the current selection (without blocks) num blocks toward direction dir(e.g. x+, z-, f for front, u for up, d for down). The default direction is front |
| /expand | expand <num> [dir] or expand <num> <num> [dir] | Expand the current selection num blocks toward direction dir(e.g. x+, z-, f for front, u for up, d for down). If two nums are given, selection will be expand toward and also opposide the player |
| /glome | glome <id> <radius> [<x> <y> <z> <w>] | Generate a glome of radius radius with material id. The center is at the position of the player if coordinates are not given. |
| /hglome | hglome <id> <radius> [<x> <y> <z> <w>] | Generate a hollow glome of radius radius with material id. The center is at the position of the player if coordinates are not given. |
| /spherinder | spherinder <id> <radius> <length> [<direction> [<x> <y> <z> <w>]] | Generate a spherinder of radius radius and height length with material id. The orientation of the height is given by dir. The center is at the position of the player if coordinates are not given. |
| /hspherinder | hspherinder <id> <radius> <length> [<direction> [<x> <y> <z> <w>]] | Generate a hollow spherinder of radius radius and height length with material id. The orientation of the height is given by dir. The center is at the position of the player if coordinates are not given. |
| /duocylinder | duocylinder <id> |
Generate a duocylinder of radii radius1 and radius2 with material id. The orientation of two perpendicular circles is given by dir(e.g. xy or xz). The center is at the position of the player if coordinates are not given. |
| /tiger | tiger <id> |
Generate a tiger of radii radius1, radius2 and radius3 with material id. The orientation of two perpendicular circles is given by dir(e.g. xy or xz). The center is at the position of the player if coordinates are not given. |
Macros
Because block count grows with the fourth power of size in 4D, manual construction is very hard. It’s recommended to use WorldEdit-style commands. You can write macros (a list of commands in a file) and load them with /macro. Use def <name> value to define constants, and define reusable code blocks with fn <name>: and endfn. Macros support almost all commands, except those involving file I/O: \save, \open, \load, \macro.
Example: A small village of 26 houses.
Result: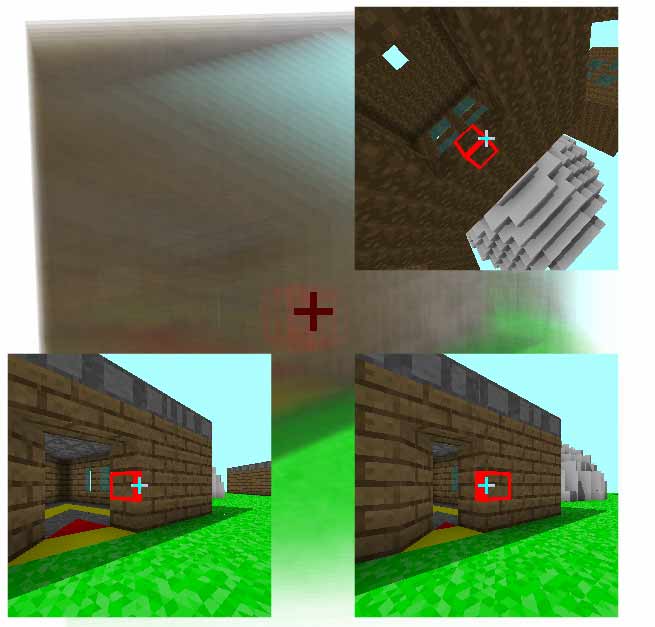
Block List
| Numeral ID | Name | Block ID |
|---|---|---|
| 0 | Air | air |
| 1 | Stone | stone |
| 2 | Grass Block | grass |
| 3 | Dirt | dirt |
| 4 | Oak Log | oak_log |
| 5 | Leaves | leaves |
| 6 | Brick | brick |
| 7 | Sand | sand |
| 8 | Water | water |
| 9 | Smooth Stone | smooth_stone |
| 10 | Double Slab | stone_slabs |
| 11 | Stone Brick | stone_brick |
| 12 | Planks | planks |
| 13 | White Concrete | white_concrete |
| 14 | Red Concrete | red_concrete |
| 15 | Yellow Concrete | yellow_concrete |
| 16 | Green Concrete | green_concrete |
| 17 | Cyan Concrete | cyan_concrete |
| 18 | Blue Concrete | blue_concrete |
| 19 | Purple Concrete | purple_concrete |
| 20 | Gray Concrete | gray_concrete |
| 21 | Black Concrete | black_concrete |
| 22 | Cactus | cactus |
| 23 | Creeper Head | creeper_head |
| 24 | Enderman Head | enderman_head |
| 25 | Player Head | steve_head |
| 30 | Glass | glass |
Scenery List
(Images to be added)
- Forest

- Desert
- Desert Pyramid
- River
- Village
- Desert Village
- Observatory
- Desert Well
- Swamp
- Road
How It Works
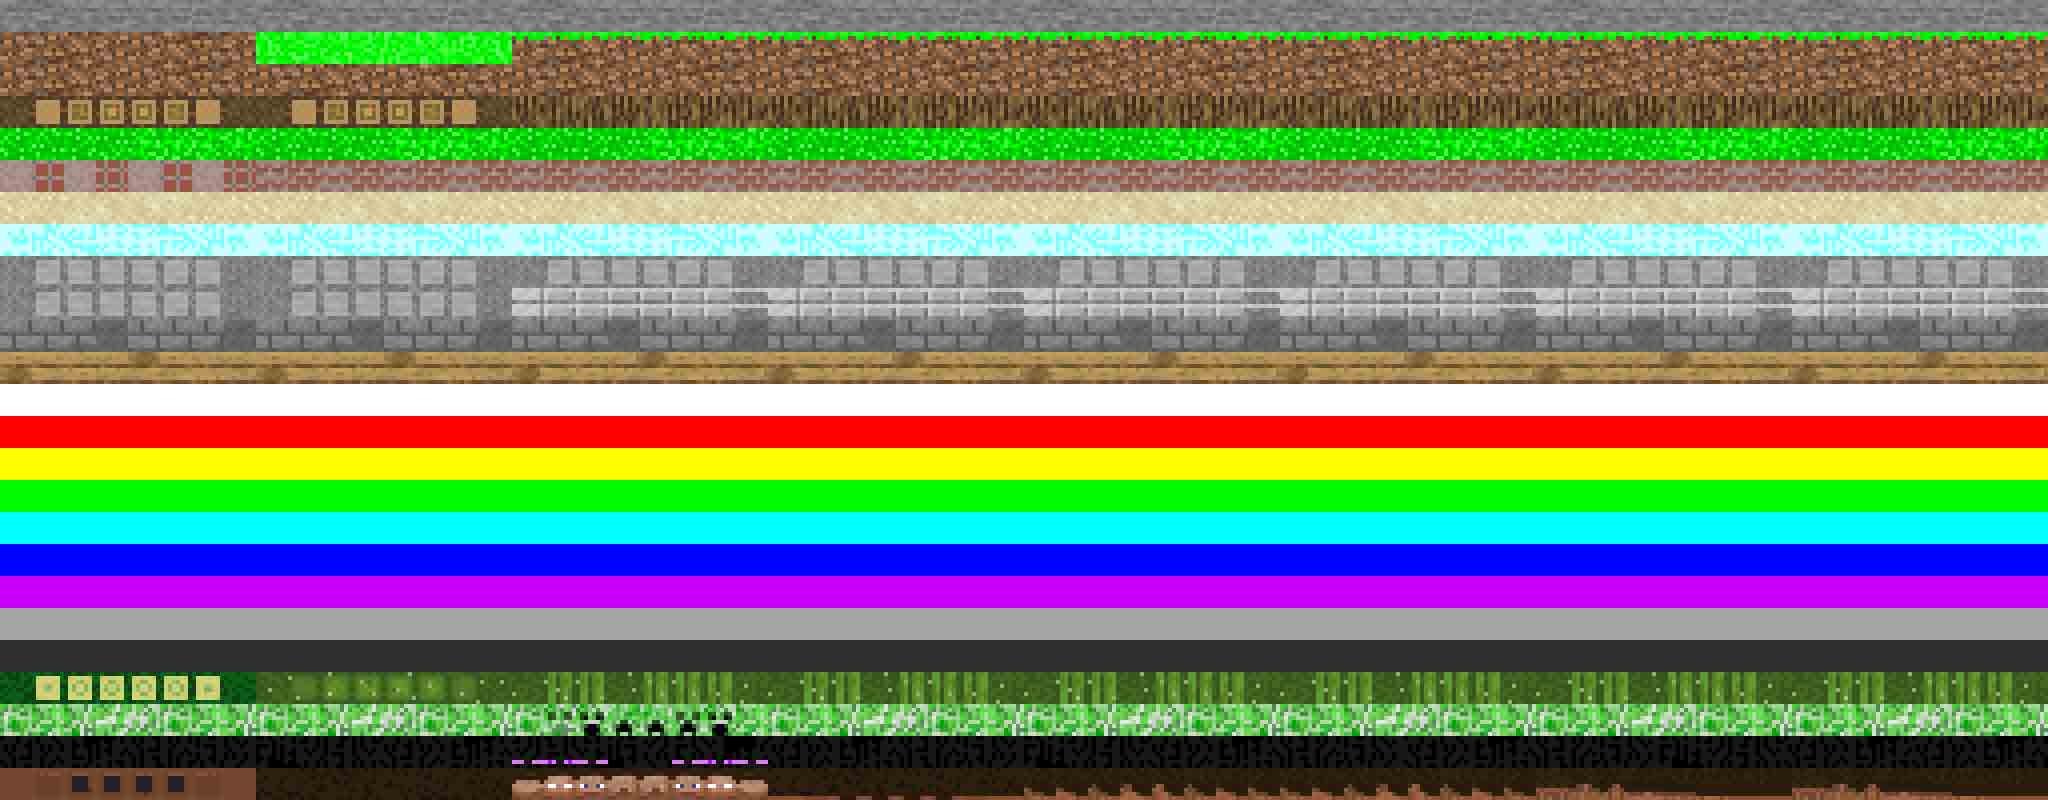
A brief explanation of Minecraft4D’s internals. Like Minecraft, it stores the world in chunks. The 4D world generator is similar to 3D. Rendering uses ray tracing to compute intersections, implementing only basic ambient occlusion and solar shadows. Texturing is interesting: 4D blocks require 3D textures. Inspired by Minecraft’s 2D texture files, I manually drew 3D textures layer by layer — 8 layers total at 8×8×8 resolution. The textures are stored in normal 2D .png format, where each cubic texture is drawn in 8 slices.